Scott Kelby’s Photoshop Insider Blog has a useful post on a look I favor that is similar to an effect you can also achieve with the Lucis Art Pro plugin for Photoshop. The settings aren’t quite as powerful as Luci Art Pro, but for many photos they do a great job, very simply. The only problem is that Kelbys post tells you how to do this in Lightroom or Camera Raw, but I use Apple’s Aperture to manage my Raw files and other unedited shots. When I looked around for help I found this You Tube tutorial on the same subject. It is a great tutorial, but it is of no help regarding Aperture:
I really was surprised that I could not find any blog post anywhere translating the settings to Aperture, so I went about doing so myself. Some of the Sliders have different names, and most have different numbering conventions. I’m pretty sure these settings are right, so I’m sharing them for anyone else who might be interested, but let me know if you have any other suggestions.
Here are the settings I came up with, using Kelby’s list with my Aperture instructions added in italics:
- Recovery = 100 This is named the same in Aperture, under the Exposure section. All the way to the right, 1.50.
- Fill Light = 100 This is the “Shadows” slider in Aperture under Highlights & Shadows. Also set it to 100.0.
- Blacks = Drag this slider to the right until photo looks balanced again, because setting the Fill Light at 100 will wash the photo out big time. In our example, I dragged it to 24 In Aperture, use “the Black Point” slider under Exposure. Same instructions. I set it to 4.3o in the example below.
- Contrast = 100 Use the Contrast Slider in Aperture under Enhance. 100 is all the way to the right in Lightroom. In Aperture, that corresponds to 0.50, but I pulled it back a little to 0.17.
- Clarity = 100 For this, I used the Definition Slider in Aperture, also under Enhance, and set to the extreme right, 1.00.
- Vibrance = 100 “Vibrancy” in Aperture, again under Enhance, to the extreme right, 1.oo.
- Saturation = -81 (basically what I do here is drag the saturation all the way to the left, to -100 (which removes all color, making it a black and white image), and then I slowly drag back to the right until some of the color starts to return to the image. Again, this has the same name in Aperture, under Enhance. I set it to 0.77 in the example below.
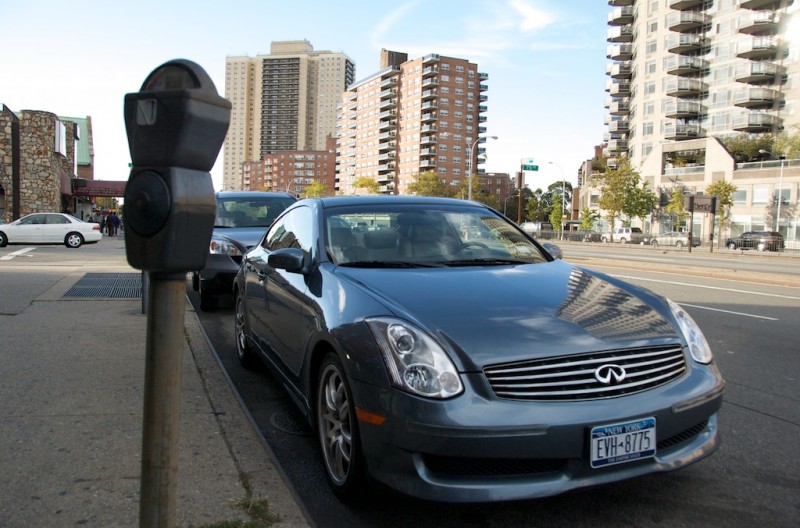
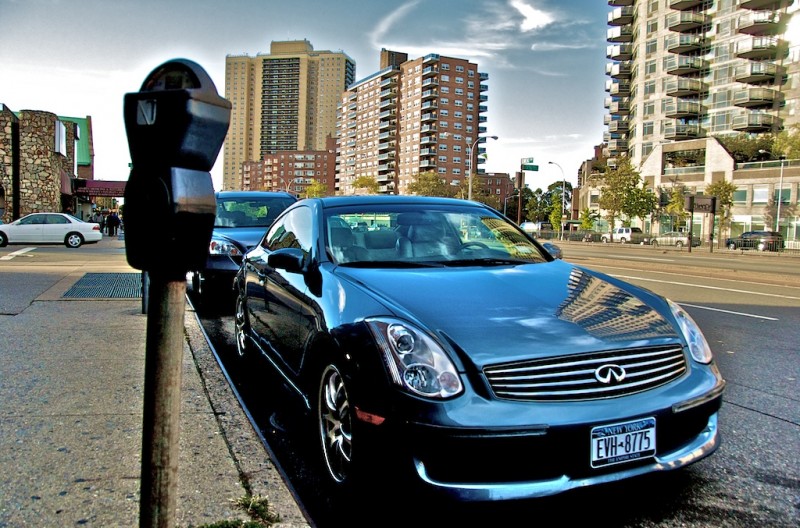
That’s it. Below are an original and an edited version I made of a simple photo of a car on Queens Boulevard, using the setting above in Aperture. The plain version comes first, followed by the edited version. As with all photos, click on the image for larger version.
Here it is with Scott Kelby’s “gritty” settings as I translated them to Aperture:
The sky is a little bland and gray, so I might do more to touch this particular photo up, but I wanted to show how these settings work without additional alterations. I hope people find this useful


Luis
5 Dec 2009Hi Mark,
Thank you for this article, learned a lot from it. I am an Aperture user as well. Lucis Art Pro is very expensive but I see you can get similar results with Aperture as well. I may save the money for Lucis Art Pro to buy more glass. I think photographers will never complain of having toomuchglass :).
Kmach
31 Mar 2010Thanks for the article. I had been searching for instructions to achieve the gritty look in aperture until now that I found yours. I set them as a preset and now that I understand how it works, I can do some tweaking here and there. It is great.
Pingback: My First Blogiversary » Too Much Glass