It’s funny how I can go out on a photo shoot and start repeating a theme or a compositional trick without realizing it. I have previously mentioned that my thought process while composing in the field is almost sub-conscious. I probably think more about composition when I am not taking pictures than when I am. Out in the field, everything I know or have been thinking about sort of sits in a stew, bubbling just below the surface.
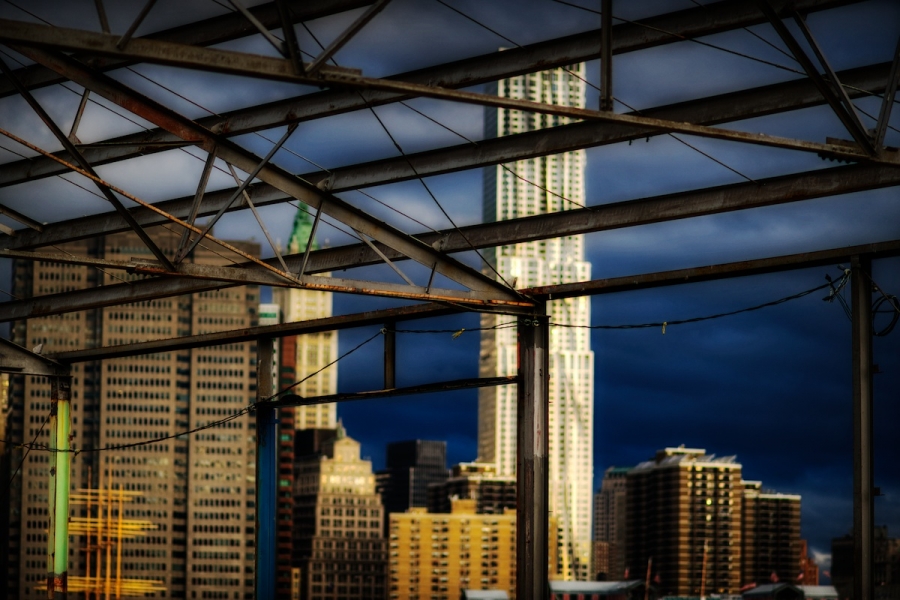
This is from my trip to Brooklyn Bridge park. I knew that I took a shot of this metal framework with part of the skyline behind it, but until I got home I did not realize that (1) I obscured the dominant building with both a vertical piece running halfway up, and then a series of slanted horizontal pieces across the upper half, and (2) I focused on the metal framework and kept the buildings out of focus.
Had someone asked me about the shot before I offloaded my CF card, I probably would have guessed that (1) I had framed the main building by the yes, framework, and (2) I kept everything in focus. Now, one of the first compositional tricks I learned in the past year is to put a dominant element in the foreground of open air landscape or architectural shots. Usually you do so with a large enough depth of field to have both in focus. Sometimes, if the foreground element is strong enough, you might put only it in focus, as I did with the bicycle seat here. What I have noticed in my shots from that day is that I did it multiple times with foreground elements that are not all that fascinating, such as some foreground rocks, or this shot with the metal framework, and yet I am happy with the results. I had no plan for this, and again, until I got home I did not even realize I was doing it. But apparently something about that skyline that morning made me want to keep using it as a background rather than as a main subject. By the way, this is the same structure as the one in this shot. The shot was five brackets handheld, as I had happened to take the camera off the tripod just before passing by this structure, and for whatever reason I did not put it back on to start taking brackets again.
As for the processing, this is another mixture of OnOne Photo Tools and Nik Color Efex. One difference in how they operate is that applying multiple filters in Nik requires exiting and restarting the program, while in OnOne, you can stack multiple filters without leaving the program. I think if I learned OnOne first, I would find the Nik process frustrating, but having learned it first, I see benefits to both. One side benefit of the Nik process is that each filter creates its own Photoshop layer, with the specific filter used added to the layer name. So it has become a part of my workflow to review the layers just before I flatten them and save the final version. It is an easy way to remember what filters I used so I can write them up here. OnOne only creates a single layer, no matter how many filters or effects you stack together, and it is just called OnOne Photo Tools or something like that. Which is fine, but until I start remembering to take notes of what I did in OnOne before I click the “Apply” button and exit out, I will have processing notes as follows:
First I applied the Glamour Glow filter in Nik. Then I did a bunch of stuff in OnOne, which I don’t remember, except there was some mild sharpening involved. Then I finished with the Kodachrome 64 Film Effect filter back in Nik.

Jim Denham
4 Nov 2010Great verbiage Mark! I like the processing and don’t mind the skyline being out of focus.
Pingback: Tweets that mention Framing » Too Much Glass -- Topsy.com
Jon Hochman
4 Nov 2010I like it too. I couldn’t help thinking about the way the buildings in the background had the same kind of skeletons as the I-beams we’re looking at them through. The gauzy look and beautiful light on the buildings, in contrast to the bones of the wharf sheds, also suggests a kind of ephemeral quality to the buildings.